Filtering Gameplay Tags ? No problem

Gameplay tags are a very powerful feature introduced in Unreal Engine and nowadays pretty much everyone makes use of them, be it because of the Gameplay Ability System (GAS) or simply because of the need to categorize things.
Although they’re really powerful, as a project grows in size their number tends to increase by a fair bit and looking for the right tag at some point might take some time.
What not everyone knows is that the “search” can be avoided by simply adding a filter like so:

UPROPERTY(EditAnywhere, BlueprintReadWrite, meta=(Categories="DST.Pawn"), Category = "PawnInfo")
FGameplayTag PawnTag;

Basically the meta=(Categories=”DST.Pawn”) is telling the editor to only show children tags of “DST.Pawn”. Every other tag won’t clutter the tags panel when editing that property.

Cool right? What is even cooler is that you can also do it for functions 🙂


UFUNCTION(BlueprintCallable, BlueprintPure, Category ="DynamicSkillTree")
FDSTPawnInfo GetPawnInfo(UPARAM(meta=(Categories="DST.Pawn"))
FGameplayTag PawnTag);

The above does exactly the same as the previous example and avoids the risk of passing any unwanted tag to the function.

Enjoy!

Building a “smart” castle

General Overview on a Castle Building System

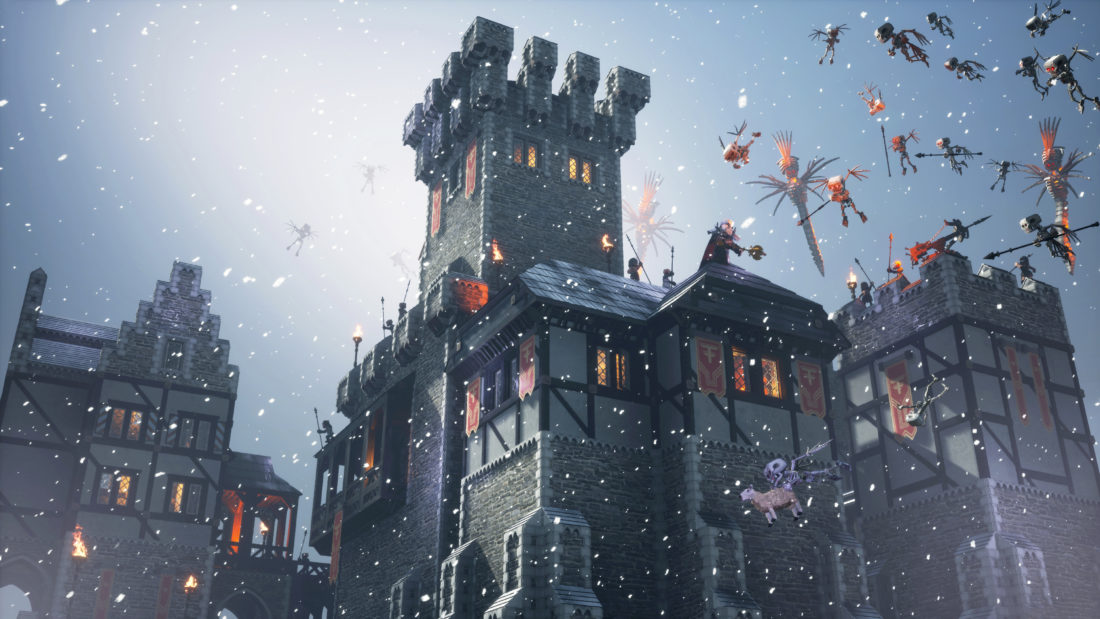
While working on our upcoming game Castle Craft at Twin Earth it became quite obvious that we would have needed a solid and performant system to allow the player to build awesome (and possibly also crazy) looking castles and structures.

After the initial brainstorming it was clear that the classic modular approach was off the table, especially because of the voxel approach the game has (the number combinations of meshes required for such a thing would have been simply insane).
After a few calls with our lead 3D Artist Finn Meinert Matthiesen I proposed we’d try a procedural approach to building things and we both started working on a basic prototype.
The basic idea was to create a sentient voxel (or cube) that could shape shift and “fuse” with the surrounding  depending on certain combinations of neighbouring voxels/cubes,  but the big question remained:  how do we stay away from the countless combinations?

The solution I’ve found was to split the cube face into 4 tiles (for a total of 24 meshes per cube) and have each of these tiles swapped depending on specific combinations of neighbours.

This way we could keep the number of meshes low but still be able to create interesting variations. So Finn started working on a first set of meshes that we could put together and fit the cube faces while giving the cube a more interesting look, especially when  placed next to other cubes.  
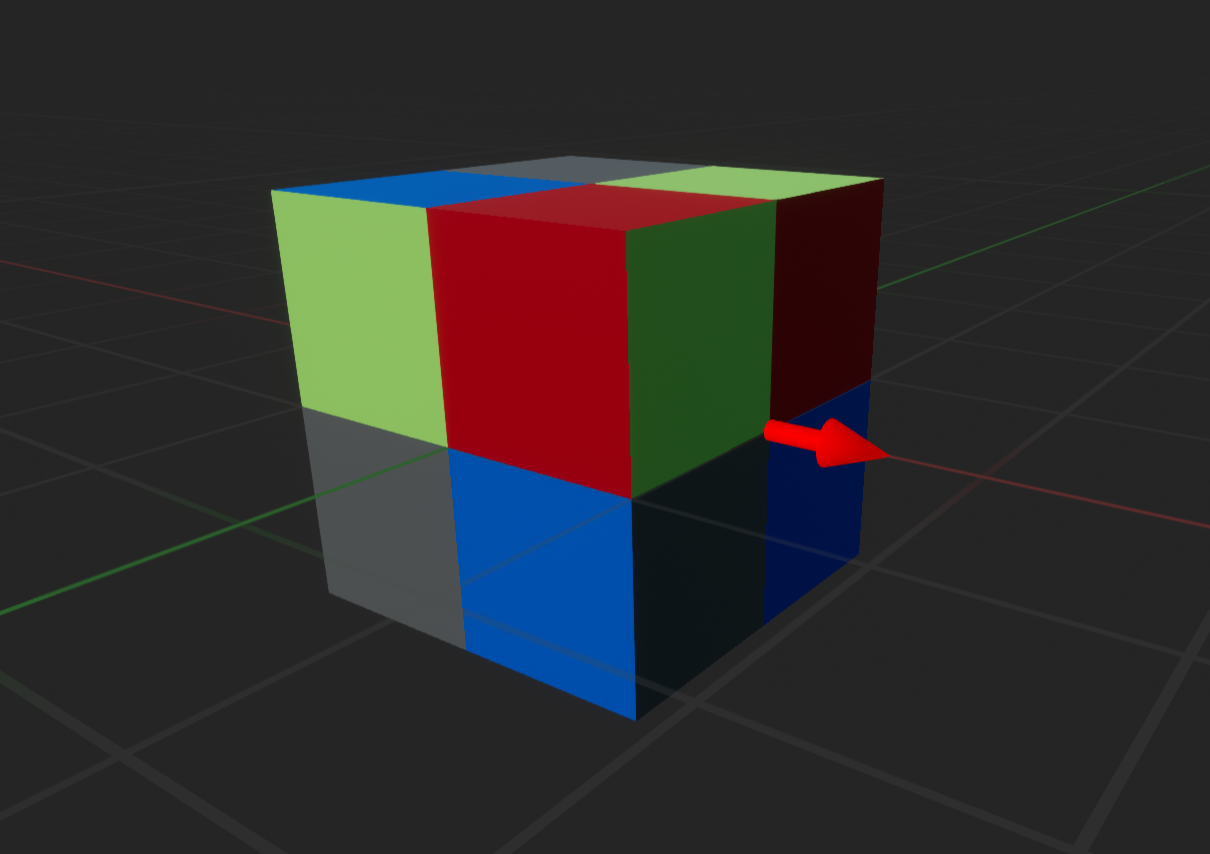
The first bunch of meshes Finn came up with looked pretty much like this:

Here is an example of the cubes that could potentially be built with just that minimal amount:

This solution introduced some factors which had to be taken into account though, the first is that while the types of meshes used were minimal, the number of meshes rendered on screen per cube would definitely increase from 1 to 24! Also how would the cube be able to detect its neighbours? And how would the different meshes be picked ?

My first attempt was to make the cube an actor and use line traces / box traces to detect the neighbours. Needless to say, although the behaviour was correct, it miserably failed.

The number of draw calls was quite high and having tons of those actors performing line traces is no small feat, even for the best CPUs and GPUs.

On the bright side, this attempt was very useful for me to test a system that could determine what type of mesh should be used and where.

The main idea was to detect the mesh needed, for each of the 24 tiles, by checking their surrounding tiles configuration.

The configuration would be the presence (or absence) of neighbouring tiles around a given one. 
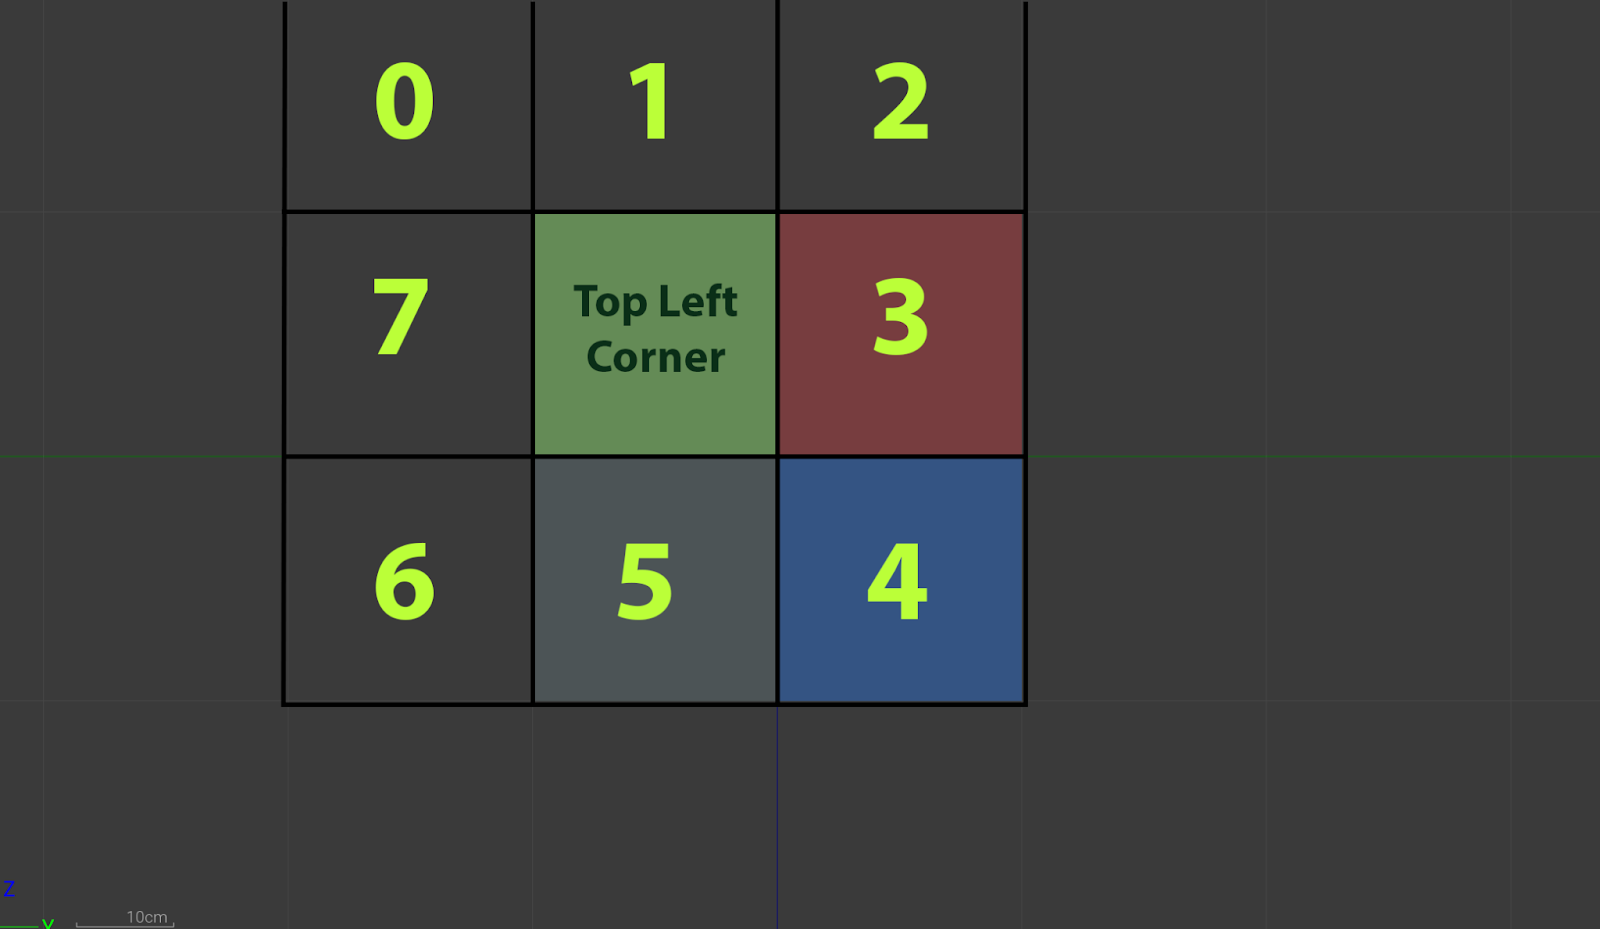
For example if only tiles 3, 4, 5 were present around this tile then the tile itself would be the top left corner. Likewise, if 3, 4, 5, 6, 7 were present, it would be a top edge.

Figuring out the other rules was pretty straight forward. 

Once the rules were in place the cube was already capable of merging with the surrounding ones pretty nicely. As a safe measure the cubes rotation is also taken into account so that cubes with different rotations can still merge.

This was the success of  this initial  iteration. A set of rules had been defined,  and they worked quite well too! 

With that in mind the challenges left were purely on the technical side but fortunately for us Unreal Engine has quite the number of tools at our disposal to deal with that.

The first matter to tackle was the many draw calls when using static meshes and Unreal provides a really handy class that helps overcoming that burden : Instanced Static Mesh (ISM)

ISM components have some limitations though, one of them is you can’t have individual LODs for each instance.  Luckily, its subclass,  Hierarchical Instanced Static Mesh (HISM) components do allow LODs per instance, so a champion had been found. 

Using HISM requires a completely different class hierarchy so the idea of having actor cubes had been benched (but this is good since the AActor class has quite an overhead and we want tons of cubes right?). 

The new setup had to be a single actor handling the cubes generation via HISM components which should provide different pieces when required but what should the cubes be then?

I opted for pure data and used UStruct (UObject was also a candidate, a very good one at that, but introduced a bit of overhead and the goal was to have tons of cubes). 

This new setup turned out to be way more complex as line traces/box traces were not exactly convenient to detect a cube’s neighbours so I introduced a global grid and had more calculations to make. Having a grid not only eliminated the need to use line traces of any sort but also gave the tools to query the cube’s neighbours in many more ways (this comes pretty handy when talking about damage propagation etc.).

What’s Next?

What would you like to hear about next? A more specific view into the current system? Damage system? Cube preview (assets generation)? Solutions to shadows/collision? Let us know!
AI tools for indie devs: a practical guide

AI content creation tools are all the rage these days and there are new impressive demos every day. For small indie studios these AI tools can be a blessing. We’ve been using AI tools in our production process to boost our productivity for several years now. Luckily, these tools are accessible even if you don’t have a R&D team that implements algorithms for you. Here is a practical guide for indie studios.

We’ll cover the following use cases:

  • Text2Speech
  • Finding Game Names
  • Animated Character Portraits
  • Concept Art
  • Tileable Texture Generation & Upscaling Textures

Voice Acting with Text2Speech

Text2Speech algorithms are useful both for prototyping and for final production. We’ve tried several tools and ended up using 2 to create the text audio for our unannounced project Elementary Trolleyology:

Google WaveNet + Google Text2Speech for UE4: The Google API allows you to generate fairly natural sounding speech quickly and at a very low price (we haven’t paid a dime yet with our use volume). You can even generate accents with it. Here are 2 examples:

The workflow is incredibly fast and allows you to create dialogue sequences in a matter of minutes:

For voices with more “character” we occasionally use Replica Voices, which is slightly less fast to work with in ue4/5 but still incredibly useful. Here is an example with added radio noise:

Finding Game Names

Finding game names that don’t violate any copyright is hard and getting harder every month with an average of 250+ games being released per month just on Steam. Things get even trickier when you take legal problems other than copyright infringement into account. One example: some words like “war” and “god” make it harder for a game to be accepted by authorities in some countries.

For this reason, it is usually helpful to have a list of 10-20 names that you can then check with your publisher. But finding that many names isn’t easy.

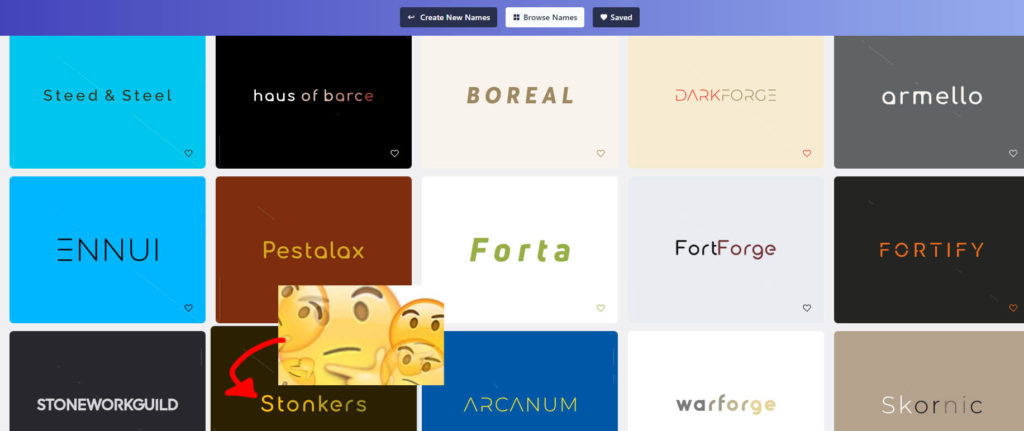
We often brainstorm for a name ourselves, and then add another 10-20 names to our list that were create with https://namelix.com/.

The results are usually all over the place (Stonkers?) but filtering 200 suggestions down to the best 10 is a fast process. Ultimately, we often end up picking one of our own suggestions. But some AI suggestions were actually really good.

Animated Character Portraits

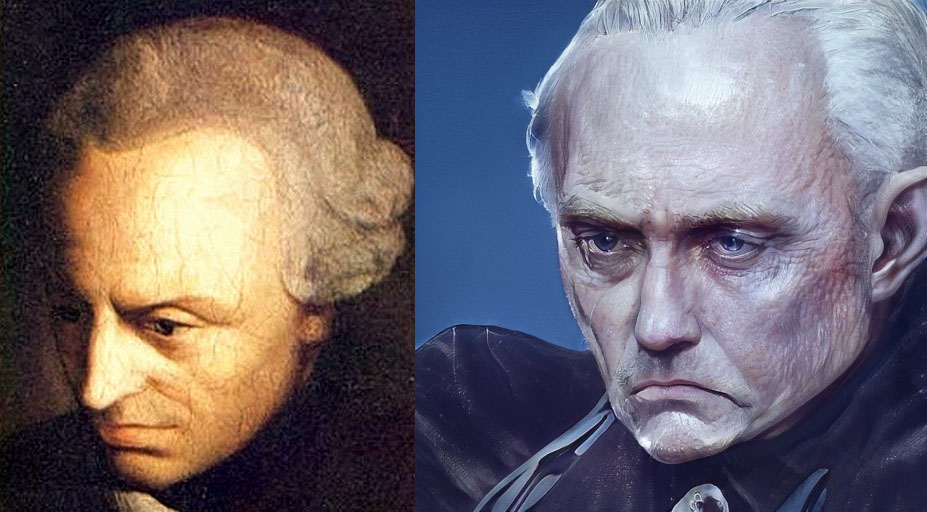
For our unannounced project we have lots of dialogue from characters and a small budget. We still wanted to give our characters recognizable faces that we can show alongside our dialogue widget. We used a combination of Artbreeder and MugLife to create animated portraits for our characters:

In our case those faces were good enough because they would only be shown alongside the dialogue widget and wouldn’t be too salient. We’ve also heard D-ID is good for animating faces, but we haven’t used it ourselves.

The philosopher Immanuel Kant: Painted portrait vs our ingame AI version.

Concept Art

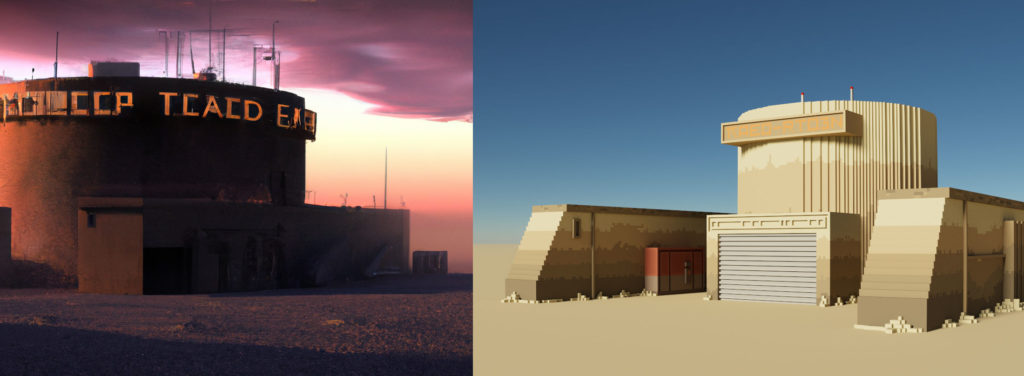
Since the rise of Dall-E2, Midjourney, and StableDiffusion this has perhaps become the most salient use case for AI in game development. We have used Dall-E2 to create concept art for our mobile voxel game.

Dall-E2 concept vs voxel mesh for our mobile game.

Two things that are good to know:

  • Usually, you get access to those tools in a matter of days to a few weeks when you sign up to use their betas. And presumably they will soon all be public.
  • https://lexica.art/ is a great search engine for AI-generated art that can take your fear of the blank paper if you get started on concept art for something.

Tileable Texture Generation & Upscaling Textures

This is the one thing we haven’t used ourselves so far, but it seems useful and so I would like to mention it:

  • AI inpainting can be used to create tileable textures fairly easily. Here is semi-automated tool for turning any surface photograph into a tileable texture.
  • Upscale old textures using neural upscaling. Gigapixel AI looks good.

Final Thoughts

Every indie dev is painfully familiar with having to make decisions on which areas of a game to prioritize given limited resources. Where AI has helped us as indie game developers is raising the neglected areas of our games to higher levels than before.

Before AI we might just have skipped voice audio. Now we can have decent quality audio at no cost. Before AI we probably would have had quick photoshop portraits for our dialogue widget, now we have animated portraits. Etc.

AI has also helped us turn creating ideas/concept into selecting good ideas/concepts in some areas. The latter is usually much faster and easier than the former.

The limitations of current AI are obvious to anyone who has worked with them. That’s why we currently see the main advantage of AI for indie devs as empowering them and making their lives easier.

Resources

P.S.: Did we miss interesting use cases for AI? Email me at jonathan-at-twinearth.com.

There are no static virtual functions in UE4 or C++. Is there an alternative?

Sometimes it would be useful to have overridable virtual functions that can be called without having to instantiate a class by declaring the function static. Here is one such scenario: Imagine you have a base class that generates and returns transforms for your enemy units. Your game mode will use that class to generate spawning transforms for all your enemy units. You want to be able to easily create new rules for creating enemy unit transforms in BP, so you implement the function as a BlueprintNativeEvent like so:

UnitSpawnerBase.h

UFUNCTION(BlueprintNativeEvent, Category = "Unit Spawning")

TArray<FTransform> GenerateTransforms();


virtual TArray<FGenome> GenerateTransforms_Implementation();

UnitSpawnerBase.cpp

TArray<FGenome> UUnitSpawner::GenerateTransforms_Implementation()
{
	TArray<FTransforms> GeneratedTransforms;
	//Here we can put some logic that generates the transforms.
	return GeneratedTransforms;
}

Using a virtual BlueprintNativeEvent allows you to generate Blueprint child classes of the UnitSpawnerBase class and override the GenerateTransforms() event to have different rules for finding good spawning locations for your enemy units. This is a handy way to manage and extend the rules to spawn enemy units. You want different enemy spawn rules based on the map, difficulty level, enemy type? Just create new child classes for each!

To run GenerateTransforms() you instantiate the class in your game mode, for example using NewObject(), and then call the function in the instance:

UUnitSpawnerBase* UnitSpawner = NewObject<UnitSpawnerBase>(GetTransientPackage(), ClassToSpawn);

where ClassToSpawn is a TSubclassOf<UnitSpawnerBase> and contains the child BP of UnitSpawnerBase you want to use.

But you don’t really need an actual instance of UnitSpawnerBase, you just want to call its function GenerateTransforms() with the default values of the class.

Normally, you use static functions for functions you want to call without instantiating a class and that can be used anywhere. But you can’t override static functions because you can’t have virtual static functions in C++. Is there a way to access GenerateTransforms() without instantiating UnitSpawnerBase? 

There is! You can access all of UnitSpawnerBase’s variables’ default values and its functions by using its Default Object. The default object is an instance of the class that is automatically generated by UE and contains the default values of the variables and serves as a template to create further instances of the class. This is how you can use it to access virtual functions of a class without creating a new instance of that class:

UUnitSpawnerBase* UnitSpawner = Cast<UUnitSpawnerBase>(ClassToSpawn->GetDefaultObject());

TArray<FTransforms> SpawnTransforms = UnitSpawner->GenerateTransforms();

GenerateTransforms() will then either run the CPP implementation if the BP child class does not contain an override of the event, or it runs the override defined in the BP class. And it doesn’t need to instantiate the class to do that!

You can also use the DefaultObject of a class to access the default values of its variables.